This is a document written by tei, intended as a starting point for fans who run communities on Discord considering moving or backing up those spaces on IRC. It is based on the ongoing testing of my own server’s migration, and as such is a WIP. If you would like to discuss, feel free to email me, find me on the fediverse, or join the #fandom channel on the slashnet IRC server.
The history of fandom is full of incidents where fans are forcibly removed from platforms owned by corporations who either actively consider fan content a liability, or are willing to let it get caught in the crossfire with a war on other content: Strikethrough on Livejournal, the tumblr NSFW ban, Elon Musk’s purchase of twitter, etc. While the creation of Archive of our Own has substantially solved the issue when it comes to fanfiction, there is still no obvious location when it comes to casual conversation, socialization, and meeting new people in fandom. Discord is one currently popular option, a corporate platform that has all the hallmarks of yet another exodus waiting to happen, and partially in progress:
Obviously, this is a decision that might look very different for different people and groups depending on their preferences and use cases, and I am not making any claims that this solution is right for you. I can only offer my experience, which was setting up test instances of several alternative options for my discord group, including:
Element/matrix: theoretically, this should be the best option. Matrix is an open protocol that’s well-established and in relatively general use. Theoretically, you could self-host an instance of it an have an easy-to-use interface with Element. Well, allI can say is that the test didn’t work like that. Through the Element app, on test matrix.org channels, the authentication weirdness was so onerous that I, the person leading this endeavour who would theoretically be down to self-host a solution, got frustrated and gave up. Womp womp.
Revolt (now Stoat): is an attempt at essentially a discord clone, and handily won the initial vote I held on this issue– which not very many people participated in. Once we started geting more serious about actually creating and using the alternative space, though, and more people started trying to get on, it, the cracks appeared right away. It was just too buggy: messages weren’t arriving, people couldn’t get in, and the nail in the coffin was that the iOS app is in beta and wasn’t open for new testers at the time we were trying to test it. Even if it were finished, apple app store regulations are one of the major drivers of anti-sex and anti-queer content restrictions on major platforms, so it’s not exactly a plus. Theoretically, it can be self-hosted, but I was advised that it’s a PITA to do so.
IRC seemed, at first, to be a bit of a dark horse. On the plus side, IRC is a fully decentralized protocol that is literally older than the World Wide Web. It’s owned by nobody and will survive as long as there are working computers. But my memories of IRC are from over a decade ago, when it meanst no message history, no images, and being constantly disconnected whenever you left your computer.
However, those are to a large extent solved issues with modern IRC servers and clients. All three of those issues– message history, easy image upload, and staying connected across multiple devices in the way discord users expect– are fully solved in the fully self-hosted solution described here. I’ll also describe how to test out IRC by making your own space on an already existing server and using downloadable clients.
Protocol: IRC is a protocol, that is to say, a set of rules about how something should work. If you haven’t heard this term before, think of it by analogy to email. The protocols underlying email make it possible for different computers using different pieces of software to send messages to each other. There are lots of different services offering email, and lots of different ways to access your email messages, but they all work together; you’re free to send a message to a gmail account from your outlook account.
Server: The IRC server, also called IRC daemon or IRCd, is the software that keeps track of the messages. It’s almost always going to be housed on a virtual machine hosted in some data centre that sells hosting services (you can host such things from a server housed in your actual house, but that’s far beyond what I’m willing to do or would recommend anyone who needs this guide do.)
Client: This is the software that gets the messages from the server and delivers them to your eyeballs. Lots of different clients can connect to the same server, and everyone chatting will be seeing the same messages even if they’re using different client software from each other. There are lots of IRC clients that are desktop software downloaded to your actual computer, so they live in your house instead of in a data centre. However, the client I’m going to describe setting up is a webapp, so you’ll install it on a remotely hosted machine and then install the webpage on your computer or phone as an app. From the end user perspective, there shouldn’t be much obvious difference between these things, but I wanted to mention it so you get why you can’t take thelounge (the webapp client we’re going to be using) and install it on your computer in the same way that you would, say, Halloy, a popular cross-platform IRC client.
IRCv3: In order for any IRC client to be able to connect to any IRC server, everyone needs to agree on how the thing works. The specifications are the set of rules for the protocol, and IRCv3 is the latest, in-progress update of those rules. You don’t really need to know anything about it, but Discord users wanting to reproduce the Discord experience as much as possible will likely be interested to know what features currently exist as drafts: multiline messages (who fix IRC’s annoying habbit of splitting up long messages into several messages), metadata which will allow profile pictures and emoji reactions, message deletion, chat history, and direct replies to messages. In order for these features to exist to the user, both the server and the client has to be implementing them: the IRCv3 site has lists of which pieces of software implement each new feature on the page for that feature. The server I use, ergo, has bleeding-edge IRCV3 support; however the client has only implemented some, but not all, of these features. (“So why not just use a different client!” you ask. Great question with lots of complicated answers! If I have an update involving a client that I’ve fully tested that implements all these features succesfully and is easy to self-host, I will let you know!)
If your goal is to provide as seamless as possible an experience to Discord users, this is the way to go. By maintaining control over the configuration of both the IRC server and the client that people are using to connect to it, I can have the following features:
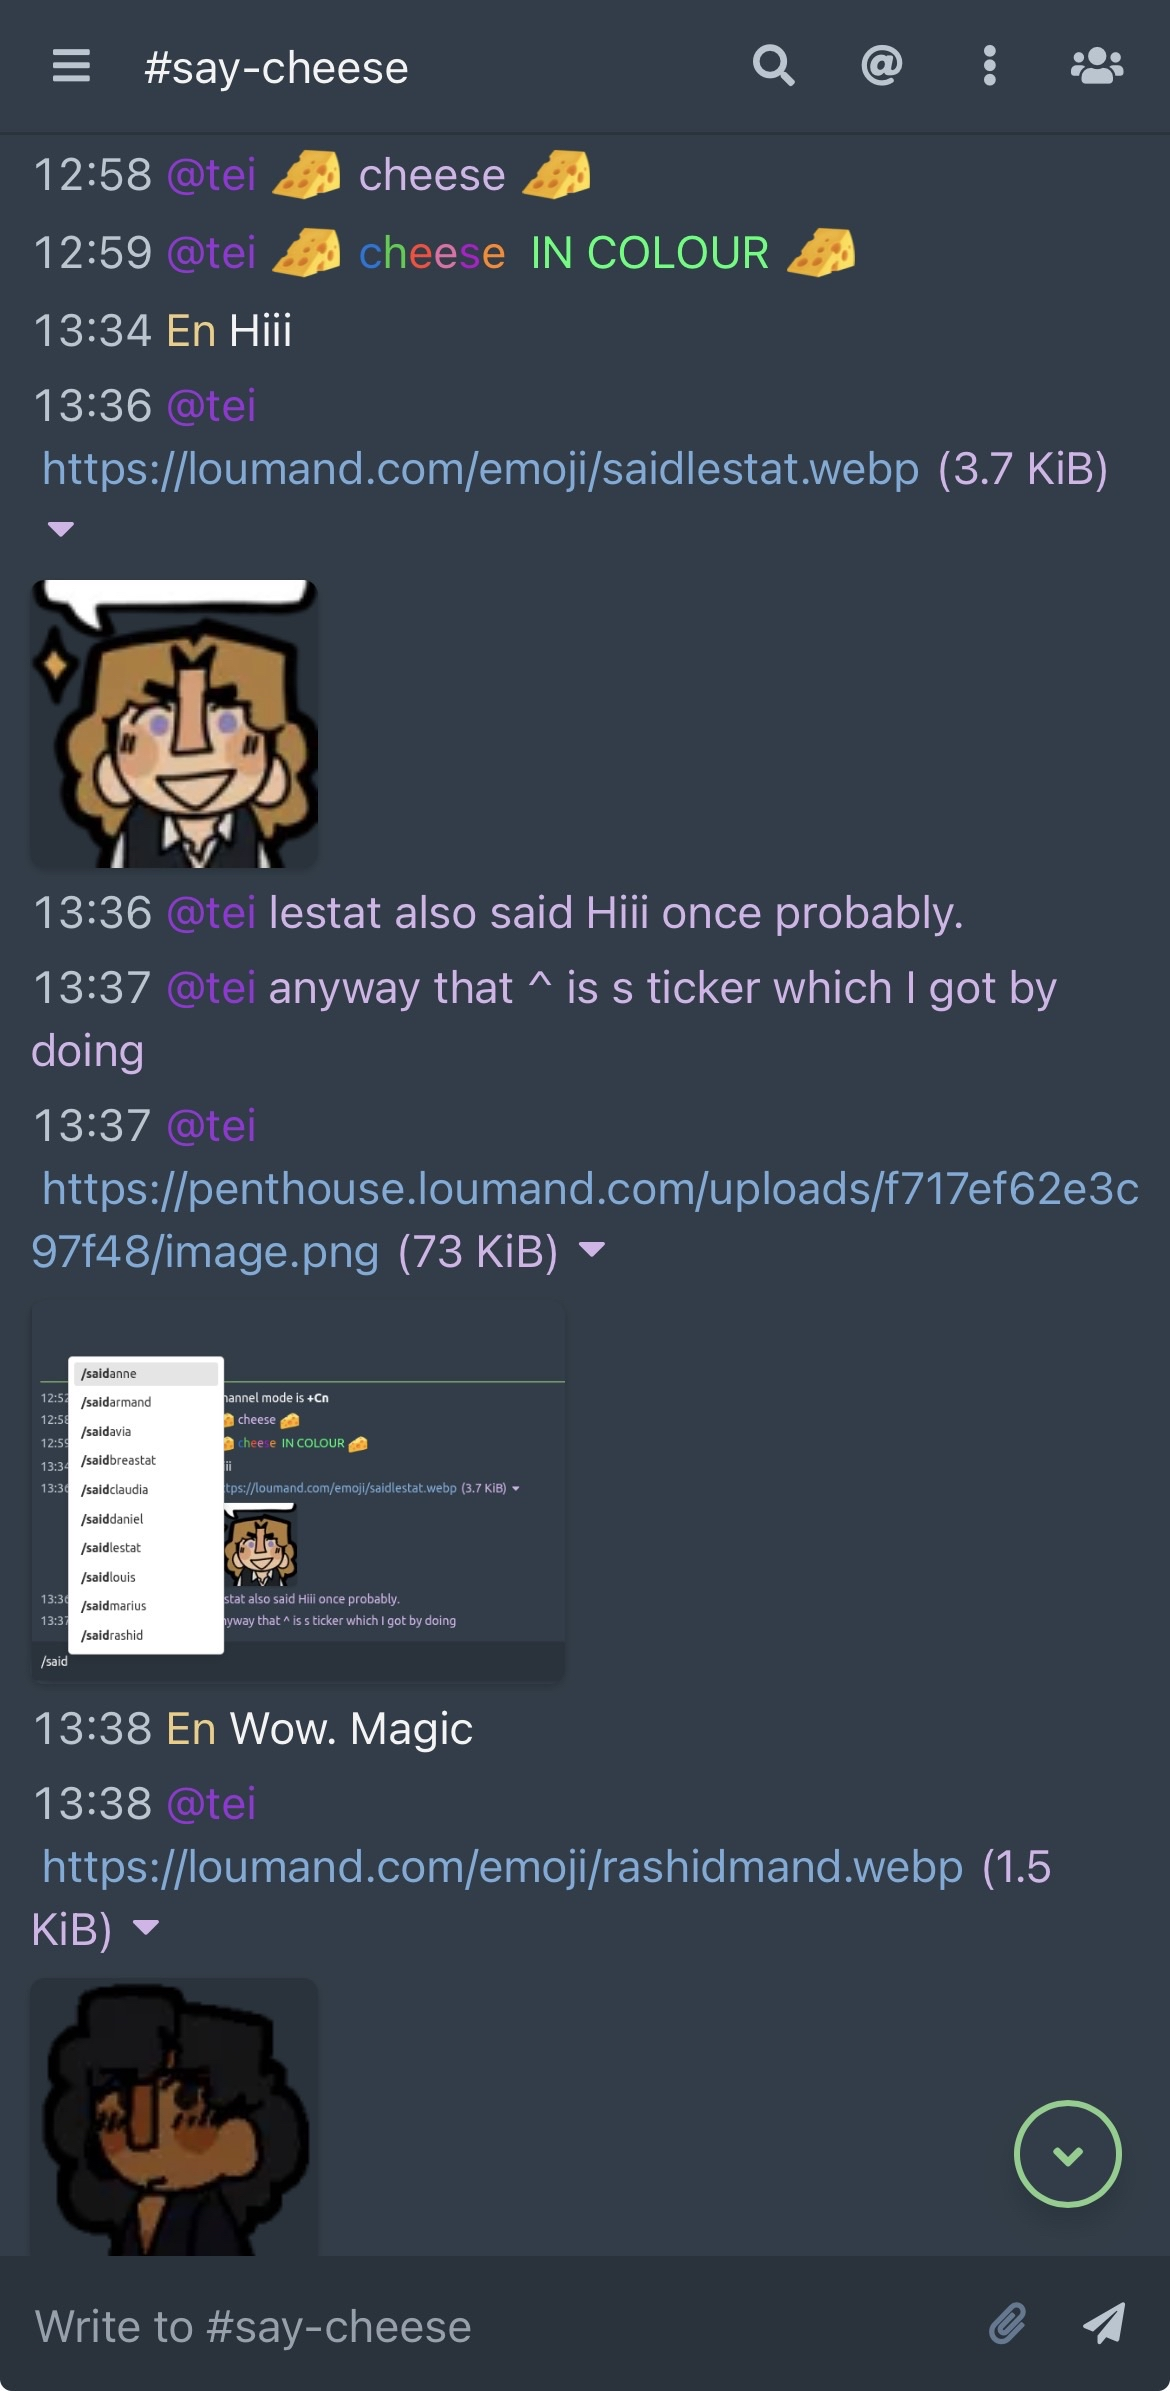
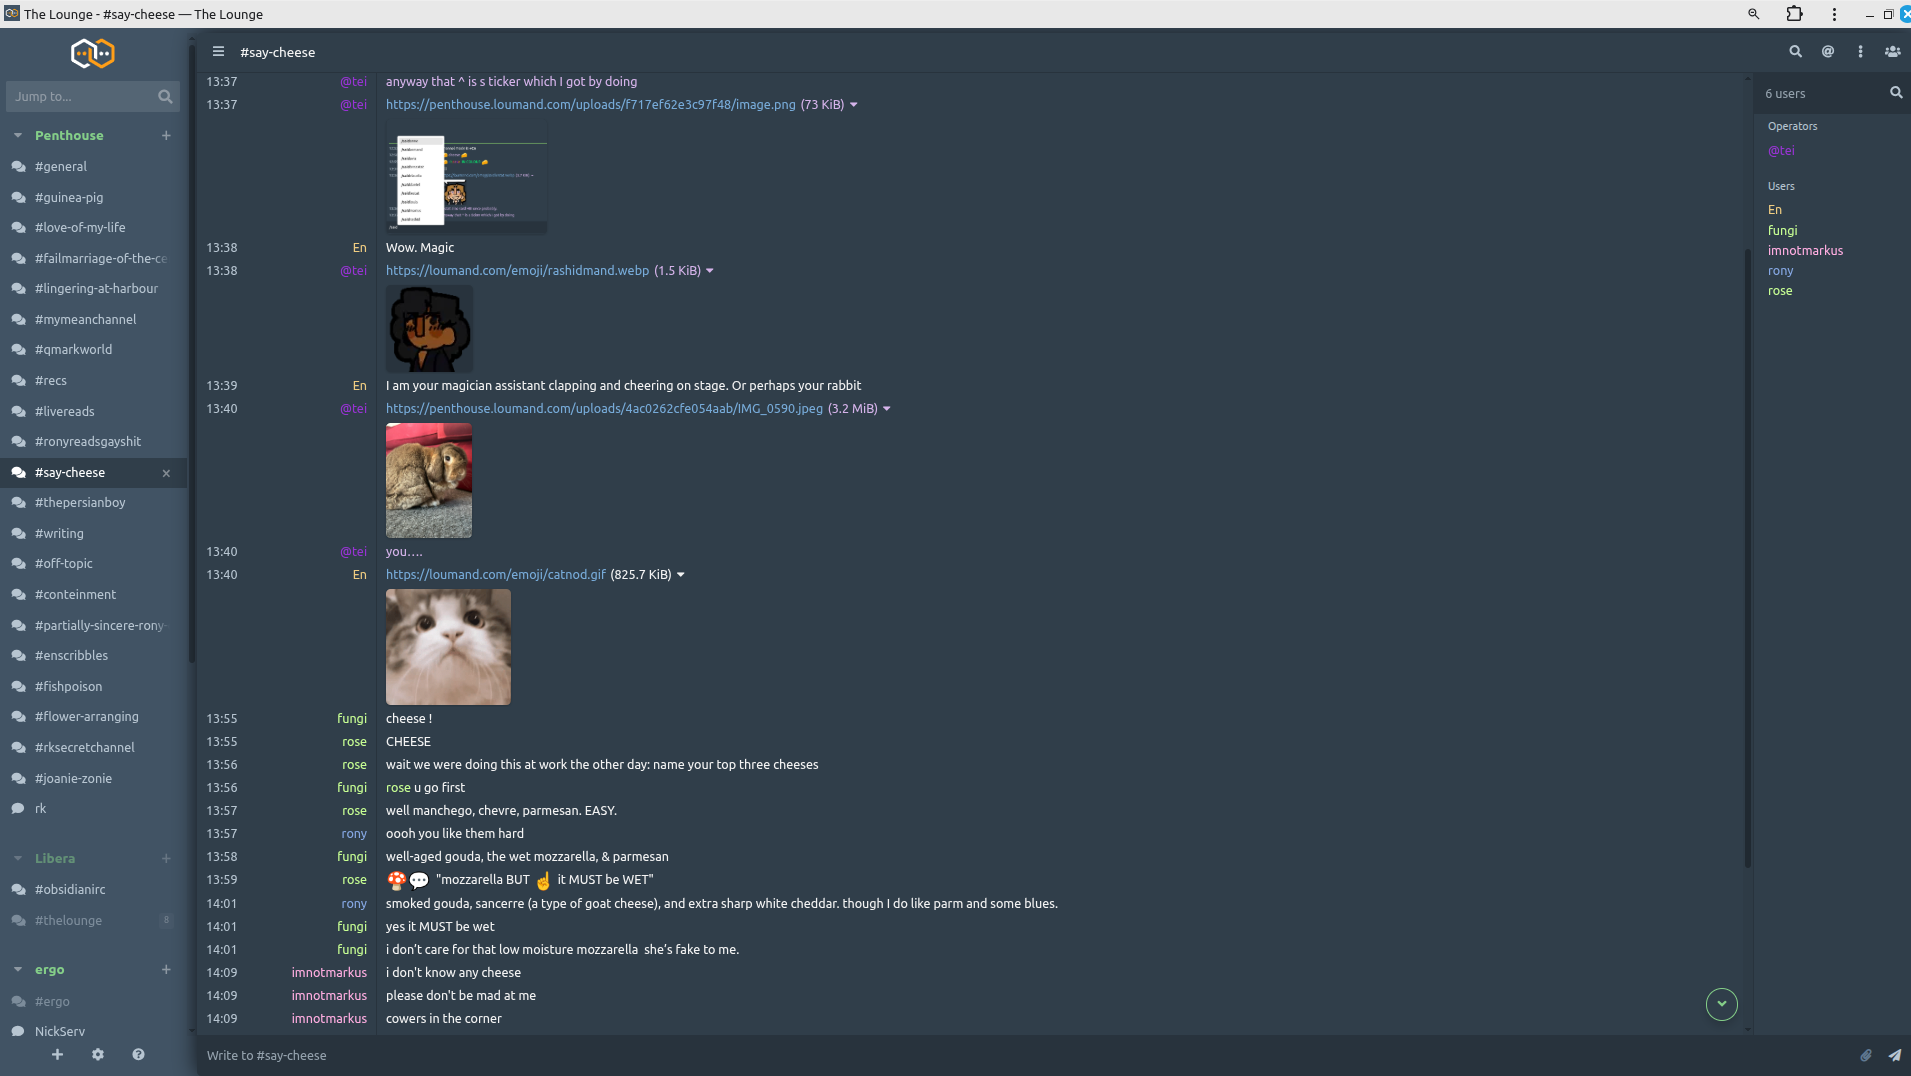
Here are some screenshots of the chat app:
Mobile:
Desktop:
To do this, you need to host the server (also known as IRC daemon or IRCd), and also a client. The combination that I’m using is ergo (server) and thelounge (client). Thelounge has an excellent progressive web app, which allows installation of an app that works just like any other, but bypassing the restrictions inherent in an app store-verified app. We’ll install the server first then the client.
Adam Newbold, founder of omg.lol, has written a complete set of instructions for getting set up with a Virtual Private Server (the machine you’ll host your stuff on) and installing ergo (the IRC server or IRCd) on it. Go here and follow the instructions! If you’re planning on coming back here and installing thelounge, you may want to skip the part on that page where you install Gamja, which is a web client like thelounge which is super quick but less full-featured. You’ll want to test out your new server with a client of some kind before going on to install another piece of software, so you can certainly install Gamja if you want, but if you just want to make sure it’s working, you can use the test instance of kiwiirc here instead of installing Gamja.
[TODO: specific login instructions for your new server from kiwiirc (gamja seems to connect automatically? idk maybe people should just install gamja to test.]
Once you’re sure it works, you may want to go back to your ergo configuration and edit some things to make it work better for this setup. In Adam’s guide he uses a yaml parser to edit the config but honestly idk how to do that so I can’t instruct you, sorry! You can just edit the config file in a text editor. Make sure you are in the directory that has the file ircd.yaml in it (you’re probably already there, but you may need to learn to use cd to get around in the command line first, pwd to check which folder you’re in, and ls to check what stuff is in the folder. Then, type nano ircd.yaml to open and edit the file. When you’re done, press ctrl-o to save and ctrl-x to exit.) My suggestions for your config:
Once you’re sure your server works, time to set up the client!
Thelounge has fairly complete installation documentation here. Follow the instructions in the “Debian and Ubuntu based distributions” section.
Set up your hostname so it’s available behind a reverse proxy with Caddy. (THANK YOU to kat for this file and caddy instructions!)
hi this is kat AKA da girlonthemoon!!!
caddy’s docs can be hard to understand, but the basic configuration for a reverse proxy is only a handful of lines:
https://example.com {
    reverse_proxy localhost:8080
}
that’s all you theoretically need for any site. however, for your IRC server to be publicly accessible, it will depend on if you are self-hosting from home, or from a rented VPS. if you rent a VPS, you should be able to proceed fine.
if you don’t use a VPS, you may have to port forward the IRC ports 6667 and possibly 6697. though this is not best practice, networking is complex even for advanced users, and so i do not recommend trying to adhere to “best practice” when you have a community you have to look after. thus, if you do not have success with the following configuration, i recommend opening those ports on your router as a last-ditch effort to allow users to connect.
moving forward, for both self-hosting and VPS users: these instructions will make use of the caddy plugin caddy-l4, which allows for layer 4 (TCP/UDP) proxying through caddy. layer 4 is necessary for IRC as it does not operate on HTTP/S.
being a plugin, caddy-l4 must be installed through xcaddy, which builds a custom caddy binary, and comes with caddy on installation. the following one-liner will build a caddy binary that bundles in caddy-layer4:
xcaddy build --with github.com/mholt/caddy-l4you may need to have thego programming runtime installed. see the golang website for instructions.
after xcaddy runs, there will be a caddy binary in your current working directory. move it to /usr/bin/caddy:
sudo mv ./caddy /usr/bin/caddybefore we start configuring caddy, make sure you have the ports 80 and 443 open in your firewall (and/or port forwarded if self-hosting). these are the ports for HTTP and HTTPS, respectively, and are necessary for your sites served through caddy to be reachable externally.
next, we will configure caddy, starting with the layer4 section.
the below layer4 config should be placed at the top of your Caddyfile, located at /etc/caddy/Caddyfile by default. this config also uses the placeholder domain chat.example.com which should be changed to your personal domain. the config may look scary, but it does the job:
{
        layer4 {
                0.0.0.0:6697 {
                        route {
                                tls {
                                        connection_policy {
                                                alpn irc
                                                default_sni chat.example.com
                                        }
                                }
                                proxy {
                                        upstream localhost:6667
                                }
                        }
                }
        }
}
the next bit of configuration is the reverse proxy for your lounge instance. this is a simple reverse proxy, and uses the example port 3000, as well as the example subdomain lounge.example.com; this domain should be changed, and should not be the same as your IRC server’s domain in the layer4 config:
https://lounge.example.com {
        reverse_proxy localhost:3000 {
                header_up X-Forwarded-For {client_ip}
        }
}
if you are self-hosting at home and have issues with the layer4 proxying, again, i recommend opening ports 6667 and possibly 6697 on your router. you should not have to open the port for TheLounge; the only ports that Caddy needs to have open are 80 and 443. (If you’ve followed the guide up until this point, you are not self-hosting at home, you are on a VPS, so do not do this unless you’re certain this is your use case.)
that’s all you should need to have your IRC server and lounge instance available for use!
Just like with ergo, there are some config things that can make things easier for your users coming from discord.
One thing a lot of discords do is make heavy use of custom emoji and stickers. The bad news is that custom emoji aren’t an option (FOR NOW– in theory, it should be possible to create a custom font, put them in the unicode private use area, and then use your font in your theme? but idk how to do any of that yet.) Instead, what I do is upload image versions of all our emoji, in a public-facing folder on your server. [TODO: find some instructions for how do do that that pick up where someone’s going to be at this point I guess?] Then, you can use the shortcuts plugin to make a word autocorrect to the URL of the desired image. Stickers!
There are instructions and screenshots of installing the app and setting up notifications on mobile and desktop over on the info page for my community’s server setup, so head there for more information on app installation. There is also a section on formatting text in the mobile version, which is fuller-featured than discord (colours!!) but takes a bit of setup on mobile.
Coming soon…
Yeah you can also do this…